Monday, January 31, 2011

Quilt Along with Melody 2011

QAWM 2011


The theme this year will be “I always wanted to make…”

It can be anything that you wanted to do one day but put off because of fear, or lack of commitment, or because it was so different for you and you really wanted to keep working in your own style, or…just any other reason that prevented you from tackling it. Anything goes. It does not have to be a finished quilt, or other quilted item, but it should be something that you are now giving yourself permission to finally try.
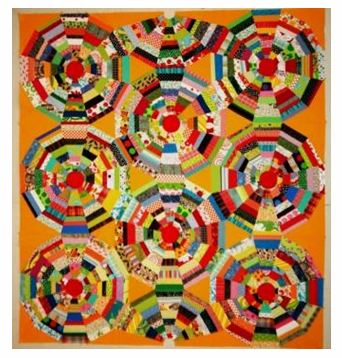
I have been gathering a picture file called “Someday I am going to make this: Quilts that I love and wish I’d made, and know I could, but haven’t.” (Long title!)

The file is getting larger and I am not getting any younger, so when will I start on any of these?
Now.
 I don’t intend to make a whole quilt from every idea and I certainly will not be making a bunch of different blocks and then try to put them all together into one quilt. (Eeeoouuw. I loathe sampler quilts.) But I do want to push myself to broaden my experience in quilting and to have the thrill of ‘my version’ of some of my favorite traditional blocks or contemporary quilts.


You may make some finished products, wall sized, or pillow sized, or just try out the idea and find out that the process is not for you. This is a time to let go of the fears/excuses/whatevers that have held you back and to jump in with both feet. You will see my attempts and I want to see yours too. Join our Flickr group to show your work and your inspiration. Tell us what inspired you and how you feel about tackling the idea. If you have a blog, link the photos to your blog so we can follow your progress.
I’ll be showing the inspiration pieces that got put in my Someday file and then show my trial piece. It will be such a learning experience for me, and I hope you will find it helpful and fun too.

We will officially begin February 1, and will continue for the entire month of February. Visit the QAWM2011 Flickr page to see who has joined and what is being made. I expect to be inspired by your bravery!

Sunday, January 30, 2011

Invisible Mattress Stitch and Box Cushions

Several requests came in for more info on the mattress stitch and sewing a box cushion/pillow. Here are my lame explanations. I am sure there are better ones online, somewhere.


Here is a quick diagram of what this stitch looks like as you sew it. It is done from the right side, with the seam allowances neatly tucked under, and the pillow all stuffed. The gap is the part that you are closing with the mattress stitch. Using sturdy thread, stick the needle into the edge of the seam allowance and bringing it back up a short distance from where you entered, keeping the thread under the fabric, of course, then stick the needle directly across into the opposite side. It looks like a ladder, no? After a few ladders, pull on the thread and it will close the gap flatly. Practice makes perfect. WE knitters use this to make seams in knits.


Here is a side view of a box cushion. It includes welting in this case, but the construction is basically the same with or without welting. Two sides, exactly the same size, and a strip long enough to fit all around the shape, is the idea.
Sew one side and clip the corners as you reach them, and then before sewing the second half of the boxing, match the corners and clip those as well . Then line up the boxing to the corners assuring there will be no twisting. This assumes that the two sides are exactly the same size and the seam allowances of  the seams are the same also. I don't usually quilt the boxing, just interface it with fusible interfacing, for stiffness.
Here it is on the pillow.
And this shows the invisible stitches closing the welted seam.
 The strip is left slightly unsewn at the beginning so that it can meet its end, stitching the seam last and then using the invisible mattress stitch to close the gap.
It is easier to do it than to just look at these directions. Really.

And Baby Makes Three


Initially I was planning to use up the innards from several old bed pillows. Then I bought more fiberfill and more batting and so I had to make one more pillow to finish off the leftovers. The center box cushion is one pillow with two fronts, leftover log cabin blocks that just had to be used in my new color scheme.  These are all going to drive Dave nuts. I expect to be picking them up off the floor every morning.
 A box edge  rather than a knife edge makes a nice crisp cushion, with no pointing 'ears' at each corner, and is simple to do. The faces are quilted while the box strip is merely interfaced (fusible)  providing a stable surface in the finished product.
To close this seam after stuffing, I used the invisible mattress stitch, no zipper or buttons on this one.

After all our recent snow we are now experiencing a heat wave. It got to be 68 degrees here and the pup is just basking in the warmth. Dave actually went to baseball practice!

PS. Monday begins Quilt Along with Melody, so 'tune in' to see what the concept for this year's QAWM will be.

Saturday, January 29, 2011

Prairie Point Closures


I took your advice and made two pillows from the two tops. But for the back I wanted simpler views. For some time I had this idea to use prairie points with button holes in the center as closures. This was the perfect time to use them. The quilt fronts were slightly larger than 23" so all my fat quarters were just a little too short to cover the entire back. Enter the flap and points. Although I didn't quilt the back, it is lined with fusible interfacing and the top is lined with heavy cotton, so that the points are quite sturdy.


There are several different aquas and turquoises in these two pillows and tho I didn't plan on having pink in the color scheme of yellows and aquas, a little pink couldn't hurt.

Friday, January 28, 2011

Inspiration, Envy and Determination

If  you were with me last March when I was piecing quilts, you might remember this wonderful quilt I found by Sujata Shah. I was so inspired with this piece that I WANTED one for myself, and became determined to make my own. It was completely unlike any of my previous work and verged on difficult, tedious and scary to even consider.

But I was finally ready for the challenge and made a template and began paper piecing it. I figured that it would take a level of accuracy foreign to my usual methods.
I contacted Sujata, a really terrific person, and got the OK. She was in the process of making hers on her blog and I was constantly referring to hers as I progressed.
It was HARD, TEDIOUS AND DIFFICULT....for me.
I quit after making seven spiderwebs, since I didn't want another bed quilt. It resides in my closet somewhere right now.

And then I thought I could try it again using fusing and it did go much faster, of course and I planned a bit more and went for darks and lights to assert the design a bit more.
It resides in my closet somewhere right now.
About that same time I saw this quilt also made by Sujata. O dear. More envy. I couldn't muster the will to attempt one, but have not stopped loving it.

Recently while browsing the web I came upon a great Dresden Plate tutorial on this site
And the wonder of the Dresden Plate (nearly the same thing as Sujata's wheel quilt here) became clear to me. I became determined to try it. No way could I run out to the store (snow!) so I was forced to create a template.

I forgot all about seam allowances in my haste and just started cutting wedges. This is where the precut strips sets came into use. I could cut two from about 6" inches at the end of one strip and still have most of the rest of the precious strip left for other future needs.
Thanks to the tute, I was able to quickly put these pieces together assembly line, making two from the wedges cut.

My first Dresden Plate! Awwww. I was able to take advantage of my recent Etsy purchase of premade yo-yos to cover the teeny gap in the center. OK it's not perfect. So?
I then felt a confidence to keep going and do something with this one and it's twin. Not a quilt...


And then I went onto this version


Here's what I learned...I can try out a challenge without a huge committment, to see how I like the process. I did enjoy this one more than the spiderweb, but still I love the scrappy stripped look of Sujata's quilt. When I was in town at Joann's I decided to buy a plastic Dresden Plate Template with inch markings so I can line up sewn strips and cut them accurately. Now I am gearing up to find the courage to start sewing strips...
You wouldn't think that after a 29 year career as a quilter I might have lingering patchwork fears, would you?
But you'd be wrong.

Thursday, January 27, 2011

Stayin' Home Again

Wednesday is my usual trip into town for knitting group and I was so ready to have some social time, but after only about half a mile in a horizontal blizzard I turned around and came back home. Hrummpf.
No pictures. You've seen it, it's WHITE.

Back at the ranch there was stuff waiting to be quilted (the least interesting part, imho) and now I have to decide if these two sides will be one pillow or two. If the choice is two, I need some backing fabric, and for that I will have to wait.  My recent purchases of strip sets and charm packs has provided lots of new fabrics to use. While not exactly a bargain, they do make it easy to have lots of variety without the expense of purchasing a large amount of fabric, and then finding a place to store it. I just found some Kaffe Fassett charm packs on Ebay and bought a set of 150 squares. Yipes! Imagine having to cut them all from different fabrics.

This is the back of one pillow side. I quilted through just the top and the batting, since this is just going to be a pillow and will have an insert. I have been thinking about quilting-as-I-go since I discovered this great blog from Marianne.
Suddenly I am re-considering all sorts of things I have pooh poohed in the past. What can this mean?

We are almost getting the house back to normal, and trying out new arrangements. When one has a long skinny room with a choice of focal points such as the fireplace and now the big black tv and stereo unit, the seating has to move to take advantage. It is still bare feeling without the quilts, paintings and curtains still to be hung. Watching the house shows on TV has really educated us about interior design.

Here's the swatch of the batik I ordered for the new curtains. I found it on Equilter.com and it is the real color of our walls, which look lighter and paler in the pictures here. I needed 18 yards for both windows and they called me to ask if they could send it in two pieces, since there wasn't enough on one bolt for my whole order. This was so lovely since one doesn't want a horizontal seam in one of the panels, so we worked out the proportions on the phone to prevent this. Isn't that super customer service?


Tuesday, January 25, 2011

So, What did I miss?


While I was unavoidably detained from going online I tried to keep my wits about me, as I fretted about finding a solution...I knit a bit. This is the Anthropologie inspired headwrap for the daughter of my friend Joann.
 A quick knit for the short attention span knitter that I recently became. I may knit one for myself, with my own modifications, of course.
And I have been dabbling a little in some patchwork for pillows. Turquoise or Aqua seems to be a theme these days.

  These triangles were made from scraps cut last February. Tiny for me...I am making a 22" pillow cover and the insert too. The other side is finished and quilted already and I will show the finished piece, when it is done.


Am I the last quilter on earth to have discovered the benefits of spray starch??? I LOVE THIS STUFF. It makes the pieces I cut so crisp and nice to sew. Simply revolutionary. I had never used it before because I fused everything and the fabric was pretty stable to use. Now that I am going back to square one and doing patchwork, I kinda need all the help I can get. The finished work is so dazzlingly 'professional' looking with the starch helping me.


I spent some time making pillows to finish the chair. I hated them. The idea was to make luxuriously cushy pillows to fall into and relax, and I made skimpy hard icky ones. What was I thinking???
So biting the bullet, I took them apart and made a nice full squishy box cushion instead. The smaller cushion in front is still hard and formal, but it will be an easy switch to remove the foam and replace it with fiberfill. Soft soft soft.


Much nicer. And I found some white canvas in my stash and made fitted washable arm covers too.
Now we are all caught up.
And now that I have internet again, I spent a fair amount of time dinkin' around shopping online for fabric for new living room window coverings. I changed my mind and switched from yellow and white stripes from IKEA to a water-y batik from Equilter.com. I'll be so excited to see that fabric arrive.
PS, I promise to make my own starch in the future when this bottle runs out, and I thank you for the recipes. And for the record, I am spraying the fabric before I cut. It makes sewing much better and the pieces easier to handle.

Monday, January 24, 2011

I'm B-a-a-a-a-ck ! !

After six days without internet access, I am thrilled and delighted to return to being online and having YOU to talk to. I missed you so much. And thank you for all the condolences about Popeye, which now seems like AGES ago...
I will not go into what caused our loss of connection or what we had to resort to in order to get back online, only to say that it was probably my fault that I plugged the wrong cable into the wrong port/outlet or componet, power source or whatever. Bygones.
The day we took Popeye to the vet was the same day that we picked up the new stereo cabinet meant to hide the spaghetti of wires from our components, speakers, tv etc. Here is the box and packaging in my studio, as we unpacked it. We brought each piece into the living room and assembled it quickly. Then came the arduous task of wiring (more wires !!!) the speakers into the receiver and all that entailed ( under the house in the crawl space). Dave worked on his knees, fishing wires into tiny holes in the floor for hours. Finally we got it all hooked up...or so we thought.


Everything worked except the internet. We could get TV, dvds and Netflix online but no internet connection via the Linksys router.
I just don't want to talk about it...really. Here we have what looked like the finished project, but no. Once we realized that we had no internet, the whole cabinet was again pulled away from the wall to expose the wiring so we could try 'everything' to make it work.
Nevermind.
In the meantime, since we had to wait a few days for help to arrive, Dave busied himself with the painting of the living room part of our change from the Mexican Chalet to the new COASTAL COTTAGE look.
Not only were we without internet but the whole downstairs was up for grabs, with paint trays and ladders and stuff everywhere. I hid out in the studio and made stuff. Chumley was mollified with bones from a roast beef. Then he got a tummy ache and lost his cookies from too much of a good thing.

It was a frustrating and exhausting time. Aren't you glad you missed my whining? The end result (almost finished at this writing) is sooooo gloriously clean and fresh and I am thrilled with the new look-to-be. Curtains are next and maybe new artwork.

Also in the meantime I just moved from my nearly completely decorated girly pink and green bedroom, to the guitar studio-guestroom space upstairs next to Dave and Chumley's room, aka the Little House of Snorers.
I had this idea to help out Dave who has to take medication every two hours, day and night. Usually he sets an alarm, and then sleeps right through it to disasterous results. I hear his alarm, wake up and climb upstairs to get him to take his pills. Now I set my little timer for the two hour interval, sleepwalking a few steps to his room to pop a pill into his sleeping mouth. I barely wake up for this procedure and we are all much happier. Dave gets a full night's sleep out of the deal and my knees have stopped complaining too.
Just so you don't worry about hitting my head in bed, I remove two of those guitars to chairs across the room. It works. This new arrangement needs to be brought up to speed, so I have my work cut out for me. To be continued.

So...what did I learn from being without internet for six days?
 I found I had five more hours in every day. I realized how little interest Dave has in hearing how this knife edged pillow I just made did not meet my expectations and how a box edged version would have worked better. And both of us saved a ton of money from not shopping online all week.
Mostly I missed not being able to talk to you and read your comments. So glad to be back!!!