
Frieda's Book Arrives!!


Everything you wanted to know about dyeing in one book! Great pictures and easy to accomplish results.


I am giving this a big WOW!! The first part of the book is all about dyeing and then she shows her work and gives fabulous construction instruction. Buy this book just for the color...toooo gorgeous!
 I may have to make some Complementary Color Gradations following her recipe for myself. Woowoo!
Her book is available AUTOGRAPHED from her website or Amazon. Thanks Frieda for sending me this lovely lovely gift.
+++++++++++++++++++++++++++++++++++++
Several of you asked for a pattern for the Spiderweb...so here's how to make your own.
Beginning with this lovely gadget, make a circle. If you don't have a compass thingy like this, use a plate or salad bowl or can lid, or something that you have around the house that is big enough to make you happy.
 Draw a circle on paper. I used the release paper from Wonder-Under, which I have lying around in closets, on shelves, in boxes, and drawers. I can't seem to toss it out...
Cut the circle out and fold it in half EXACTLY. Or close. Use that fold line to begin your template (I can't believe I am telling anyone how to make a template. Eeeek!)
 I hope you have a ruler that has a 60 degree line on it like this one. If you don't, get one. You need it. Line up the 60 degree line with the fold (which I drew in pencil so you could see it) and at the exact center point of your circle.Draw the line from the center out toward the edge and that is wedge #1. Repeating this will result in 12 wedges, which do not include seam allowances.
 Here's the wedge. Trim away the curve at the bottom by connecting the edges and drawing a straight line from point to point.
Now you can use this template as a base for paper piecing the strips or for fusing the strips as I have done for Spiderweb II.
 This shows the underside of the fused patchwork. I cut the light wedges with a 'seam allowance' and the dark wedges without one. That way the dark parts line up perfectly in place and have something to stick to. All the fabrics I use were previously fused scraps from larger fused pieces. When you fuse, even the tiniest scraps are usable.
And if you want to make an 8 wedge spiderweb with lots of white showing, here's a great tutorial.

Her book is available AUTOGRAPHED from her website or Amazon. Thanks Frieda for sending me this lovely lovely gift.
+++++++++++++++++++++++++++++++++++++
Several of you asked for a pattern for the Spiderweb...so here's how to make your own.
Beginning with this lovely gadget, make a circle. If you don't have a compass thingy like this, use a plate or salad bowl or can lid, or something that you have around the house that is big enough to make you happy.

Cut the circle out and fold it in half EXACTLY. Or close. Use that fold line to begin your template (I can't believe I am telling anyone how to make a template. Eeeek!)


Now you can use this template as a base for paper piecing the strips or for fusing the strips as I have done for Spiderweb II.

And if you want to make an 8 wedge spiderweb with lots of white showing, here's a great tutorial.
And another question:
 CommentsTreewhimsy |
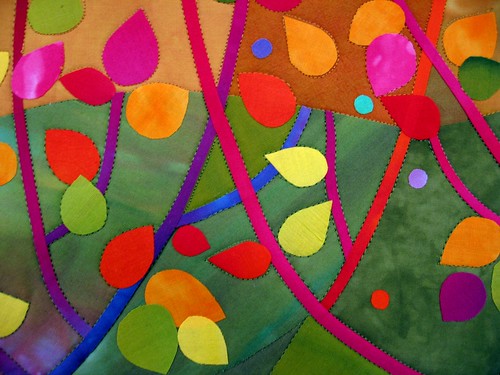
Everything is fused. I stitch next to but not on top of the fused shape. Hand dyed fabric is the trick. Nice finely woven base fabric really helps keep the edges neat, plus the fusible prevents things from fraying.


Frieda's book IS terrific. I purchased it as soon as it came out.
ReplyDeleteGreat tips for the spiderweb as well.
What's next? We can't wait to see what else you have in store for us.
I can't wait for Frieda's book to arrive. Thanks for all the lovely things that you share with us - I am envious of your bedroom - it is gorgeous!!
ReplyDeleteI just got mine the other day. Now, along with Malka's book, the next step: try my hand at dyeing. I agree, Frieda's book is wonderful.
ReplyDeleteI've had Frieda's book on my Amazon wishlist for a few weeks. Thanks to your post, I pulled the trigger. I've been dyeing lots with mixed results, so it will be great to see her ideas. (PS> I love your dyeing page.)
ReplyDeleteveryshw720gro
ReplyDeletegolden goose outlet
golden goose outlet
golden goose outlet
golden goose outlet
golden goose outlet
golden goose outlet
golden goose outlet
golden goose outlet
golden goose outlet
golden goose outlet