Wednesday, August 04, 2010

Midsummer Quilt Project: Process Pledge

 I love this Chaos quilt by Red Pepper Quilts (left)and wanted to either make my own or design something like it. Malka is doing something similar with Strips and Bricks (right) and so it must be in the air.
You know me, I gotta do it my way, and what  interested me was a certain randomness, with not much in the way of lining up seams, a scrappy kind of quilt which would use up both prints and solids.


While I was looking at my favorite quilts ripped from the web I came to this section of a panel designed by Marcia Derse. This is it for me! Four patch, simple simple simple. It would be just strips cut in different sizes, sewn assembly line and then cut into squares.  I could easily use up lots and lots of fabric, and later sew them into blocks whenever I felt the urge.
Here is the plan:
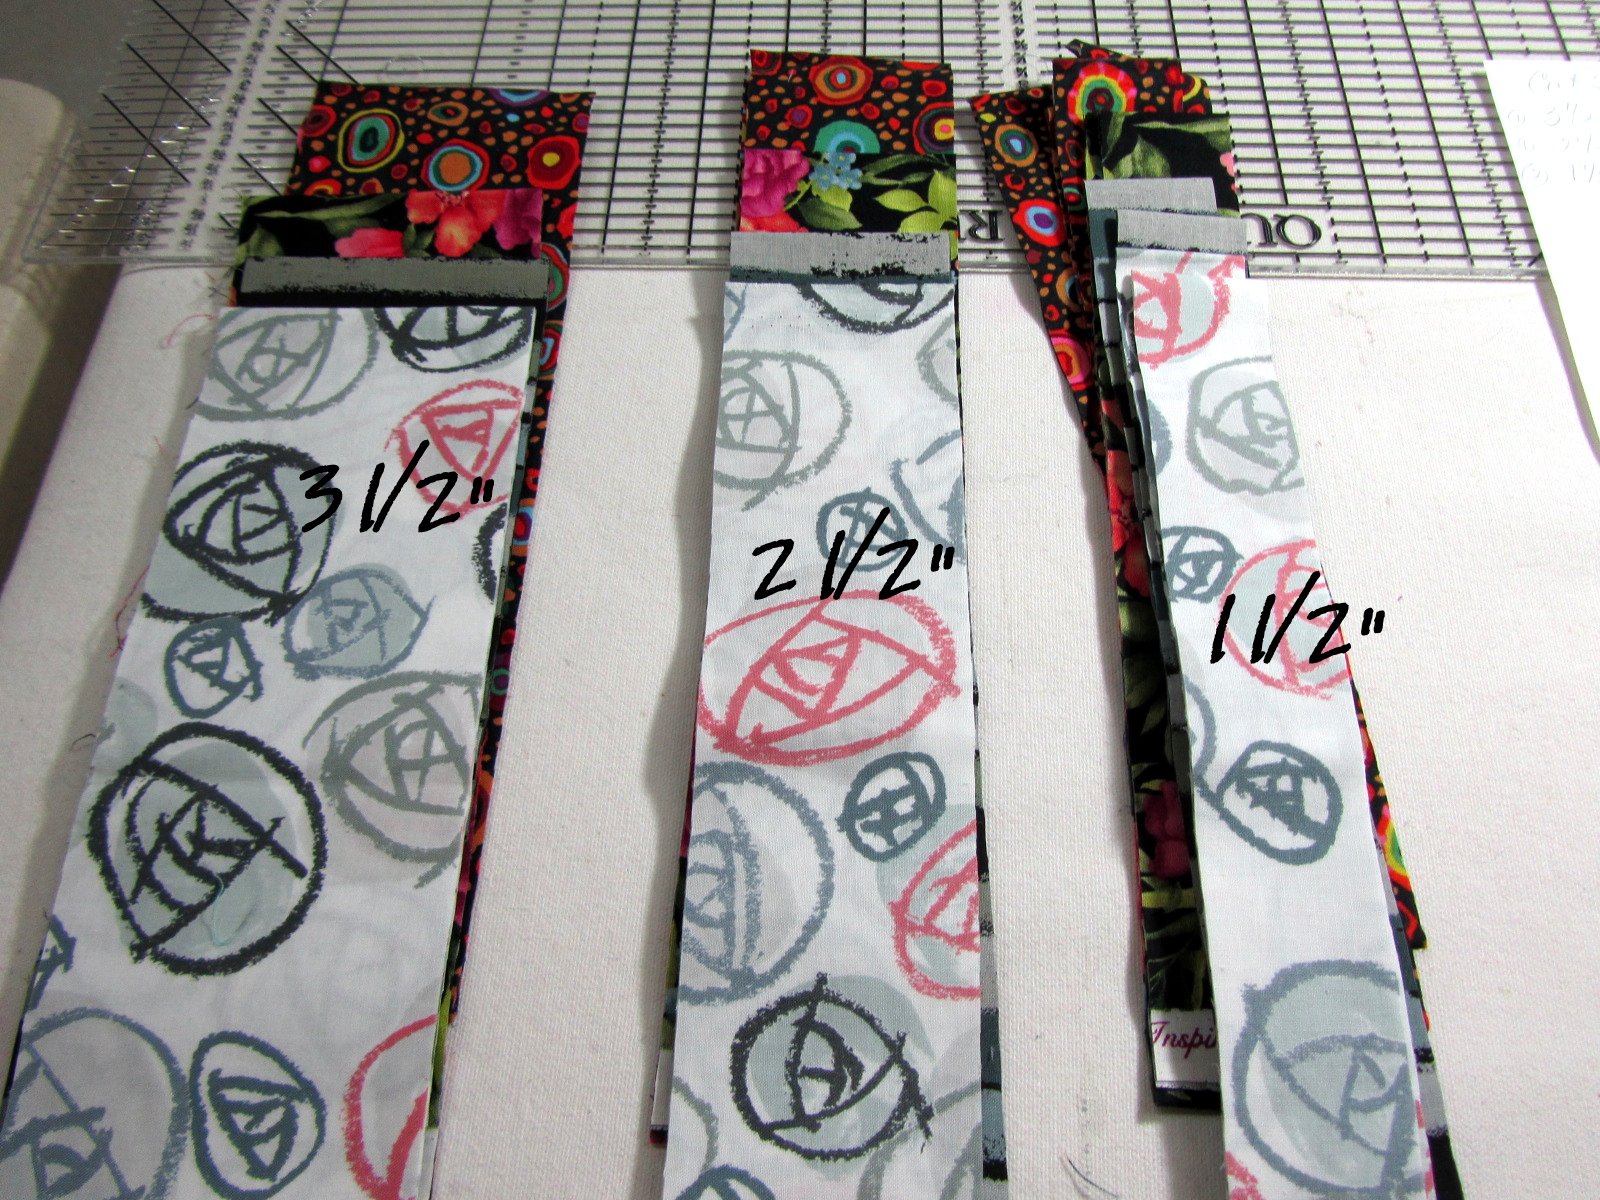
Lots and lots of strip cutting from both prints and solids. Yawn. But it will make me committed to doing this, and that is a good thing. Here's the exact measurements and the block sample. Finished size is 12" which makes it easy to calculate how many blocks I will need to make whatever it is I am making....? I think I'll just make the parts and figure out what to do with them later.
 

After an hour of cutting strips, I was totally bored and needed a break. While drinking my coffee and  looking online I saw that Etsy sent this ad to my email. Isn't this a cute bag? $18. Immediately I was inspired and had to get up and make one.

Both mine and the Etsy one are reversible and have these cute handles and would make a nice lunch bag, gift bag,  fabric or yarn scrap bag... whatever. I made mine from two pieces of cotton, 9x18" for the body and 2.25 by 9" for the handles. Each layer is backed with fusible interfacing, the kind for clothes sewing, and it is just crisp enough to stand up on its own. Now that I see them side by side, mine looks kinda skimpy, but in a cute way. The finished size is 7x9" with a three inch gussetted sides and bottom.
Heres' the process: Cut two pieces 9x18", and cut fusible interfacing the same size minus seam allowance. Fold in half lengthwise and sew side seam and bottom seam.

Fold corner to this pointy shape and measure off three inches and stitch across for the gusset. Repeat for the other side, and the second fabric.  For the handles cut four strips, two from each fabric, fuse interfacing to them also and sew together, wrong sides together. Afterwards turn them rightside out and top stitch.

Sew handles onto one bag fabric and then insert the second bag and carefully fold over and pin together the edges.  Top stitch the edge carefully. Ta-Da! Are you done yet? ;-)

Tuesday, August 03, 2010

Purple Patchwork Purse


The previous patchwork purse was a gift and was sent off last week as a surprise to its recipient, but I kept thinking about making one for myself. To begin I first had to find the yarn to make the strap. Funny place to start, but knowing that I have that covered opens up the design process as far as construction and fabric choices. I know I wanted outside pockets, and also wanted to make them from silk shantung. Silk is strong and elegant and would bring the purse up a notch from just cotton quilt fabric.
I quilted the pockets as a single piece first and then cut the fabric in half and lined it with purple Kona cotton, leaving a little of purple lining showing at the top as though it were trim. Then I had to insert them into the center panel and quilt that part next. The pockets were just seamed into place but only at the bottom seam. Don't try and visualize this, it is not all that important.
After the center panel was quilted, then the side panels were sewn on and quilted, catching the pockets in the seam at that time. I also added a loop for a pen or pencil which I am always looking for, and will keep my notepad in the pocket. The pocket on the reverse side will hold receipts which I am always collecting.


The bag has a gusseted bottom to make it stand up nicely and the I-cord strap is laced through batik sleeves caught in the top seam. The sketch book I like to have at my fingertips fits perfectly inside too. I don't carry a cell phone most of the time but it could go in one of the pockets on the front if necessary. Of course my purpley/pink camera has to be included. The pink coin purse holds my credit cards and driver's license, which are more necessary than coins.

Sunday, August 01, 2010

Hosui Pear II

Hosui Pear #2 Oil on gallery wrapped canvas 12x12x1" $150 Email me


I picked this Asian pear last night and hoped it would look as good when I got around to painting it today. This is the only fruit tree we have that has fruit we can actually eat. We don't even have to spray it. Gotta love a tree like that. I have done the Hosui before when I first got back into painting two years ago. See it on the Flickr site in my Painting Sets
Sometimes my paintings make me happy and sometimes they make me ecstatic. This one does the latter.

Garden Update : August

Around the end of July I lost interest in the garden because it got so hot and dry, but we just had a great soaking rain and that changed my attitude, as did the plants therein.
We have some winners this year and some losers. Things in the shade are doing well, even those I neglect. No sign of voles at the moment. We do have lots of tunnels in the mulch and I may be switching to hating chipmunks in the future. But let's not be negative.

On to the winners...I planted about seven canna tubers around the place, including two at the pond's edge, and since they have plenty of water I assumed they would be the bigger of the bunch but no...stunted and doing nothing. But in the garden bed under the tree shade I have my first canna blooming! I am thrilled. Several others are much shorter and hopefully in our long long growing season I will see more come into bloom. These were all cheapo bagged reduced for clearance tubers, so I will suffer no disappointment now that I have this beauty.


The Phlox that were transplanted from the front bed to the back are just doing great. Especially the white David variety. This is the second bloom, and the butterflies love them all. We also have great stands of red, pink with rose eye, and lavender. I thought I got them all out of the front bed, but not so.We have several stems of each in bloom there amongst the hosta, coneflowers and brown eyed Susans. 
In the veggie garden I did have some early harvests of zucchini (very small) and lots of yellow squash, but very soon I lost them all to vine borer, and squash beetles and all kinds of other pests. Not to worry as I was inundated with yellow squash from neighbors. But to my utter surprise the bush cucumber in the flower pots section has been a great producer. Here are three at once on one vine. Not bothered a bit by any bugs. Flower pots seem to have magical bug protecting properties.
 In the flower bed I just tossed in some leftover yellow squash seeds. They sprouted under the shade of nasturtiums (always a winning flower in my garden) and now I see I have a fruit starting. I am happy to have more squash, unperturbed by pests. Having dedicated veggie beds seems to have been just a big bug  invitation.


New this year are speedwell and these red phlox. They are complimented by the clusters of lots of red geranium.

I will definitely plant sweet potato vines again next season as these are doing so well now despite looking like Swiss Cheese earlier this summer. The Scarlet Runner Beans are also healthy, but I will plant more seeds and start earlier to get a really full green shade curtain for the porch.

In the front garden things are totally out of hand. The self seeders are taking over, not to be outdone by weeds. There is barely any sign of the 20 or so heuchera hidden under it all. This purple plant is my favorite Blue Bedder Salvia, and I have only two plants, reseeded from last year. The joke on me is that I have planted five packets of seed all over the gardens and nothing, nothing at all came up. It turns out they need planting in the fall here or forget it. I will let this beauty go to seed and let it have it's way. The same is true with the white impatiens which were purposely planted three seasons ago and not since. They just love this bed.

And I continue to swoon everytime I pass the blue hydrangea which continues to set new buds. Ahhhh.

I had the hope that these hyacinth beans would cover the railing with glossy green leaves and lovely pink flowers, but they seem to be stuck at this size. Perhaps later I will have my flourishing vines. I saw some gorgeous examples last November in Chattanooga, and I must remind myself that August is just the middle of the growing season. The seed pods are just dazzling, doncha think?


And then there is the compost pile garden. These plants were just tossed away and didn't take my rejection seriously. The caladium is just huge and was a two year old unplanted tuber which I found still in its package in my yarn closet. The sedums were surely dead roots that I was wrong wrong wrong about. And O dear, more squash seeds doomed to be trying to fruit in insufficient light.
I wish I had grown these, but they are donations, again, from lovely neighbors who take pity on my ignorant Northern ways.

Friday, July 30, 2010

Doll-Baby Surprise Jacket

 I finally stopped spinning my wheels long enough to try out the concept of Elizabeth Zimmerman's Baby Surprise Jacket. Ravelry had a pattern for a doll's size version which allowed me to knit one up in a hour or two and see how it came together, solving the big mystery for me. Isn't it cute?


Now what shall I do with this knowledge? The adult version is intriguing but since this is knit all in one piece, it ends up being a lot of stitches all at once on the needles, which loses its appeal to me. The thing I do like is that there is a chance that no thinking is required to have matching stripes all the way through. I love the no thinking/planning aspect and the using up of lots of scrap yarn in the construction.

See how much sweater there is? I grabbed these pictures and the following ones from the Ravelry site. I am not so happy with horizontal stripes across the vast territory of  the butt.


On the other hand I love how the front looks and yet have complaints about the sleeves and the way they come together. Is there no pleasing me? Why can't I be like the hundreds of knitters of this cardigan who rave about how much they loved making it?

I could go this route and just eliminate the sleeves entirely and get the striped effect. I think this knitter had luck enter into her knitting, just a bit.
I do believe that Guru1 on Ravelry has the perfect near-version.

She writes::I never do a pattern exactly as written - just ask anyone! For instance, on the bottom half of this sweater, instead of doing one back and two front pieces, I chose to do two side pieces. Same basic results but I like the placement of the miters better.
I also chose a lighter weight yarn than called for so that I could follow the instructions for the larger size and end up with 3/4 length sleeves without measuring much.

I love her attitude, so much like mine!
This one has the top down raglan shoulders which I love and can easily fake from a standard pattern in my library. The bottom half can be made in two pieces like she did, which can be picked up not sewn, and if I am careful, I can match the stripes by counting rows.
This may require a teeny bit of thinking, which is all I am up for these days.
Don't hold your breath waiting for a finished project anytime soon. I am still in the deciding stages.

Thursday, July 29, 2010

Pear Picnic

Pear Picnic
oil on gallery wrapped canvas, 12x12x1" $100 SOLD


Now I can finally eat these pears! I have been saving them to paint and they keep getting more and more ripe and you know they don't last all that long.


I picked a Brown-Eyed Susan from my front garden and thought it complimented the yellow in the jug. It sits in a tiny blue bottle lent to me last year (!) by my pal Colleen, and I recently promised I would return it as soon as I painted it. I was afraid all this time. Of what? Of painting transparent glass. But I have conquered that fear and will see if I can do it again...soon.

 When I finish a piece like this, I have my favorite parts and in this instance it might be the drapery behind the arrangement. I managed to make it look dimensional and still got that hand dyed look of my fabric.

When I paint I have to gear up and ignore the voice of doubt that still lingers. I play the radio loudly and tell myself, "It doesn't have to be PERFECT". I say that about 20 times an hour, yet I still fiddle with the edges or the shadows or the highlights or the color. And then something amazing happens. It starts to look right, after hours of looking like mush. I cannot figure out how to do that.
