
 It is the inside-out version of the Escape Hatch Finish. I explain in the lecture about pillowcasing the quilt top and turning it right side out through this escape hatch, which is already afixed with a strip of Wonder-Under, thus enabling me to close it shut afterward and fuse the backing to the quilt back.
Apparently this is confusing to some of my former students. I suppose that it doesn't gel in the memory until it is actually attempted, and at that point I get PANICKY EMAILS.

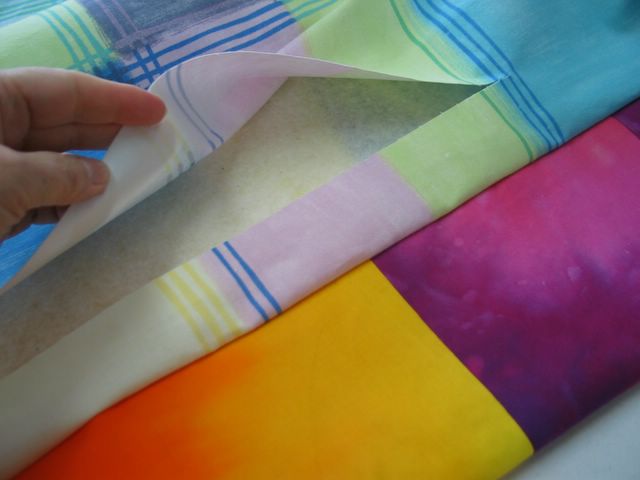
This foto shows the front and the back of my pillowcased quilt. The front is the blue and red part and the back is the printed plaid fabric. The iron is that thing on the right.
What I am attempting to illustrate with this foto is the way I press the edges of my quilt after I have turned it right side out. One wants none of the backing fabric to show on the front of the quilt, and for the quilt to have crisp edges, so therefore one must take care to press the quilt in such a way as to discourage the back from rolling forward. Since the quilt is as yet unquilted, it is easy to roll the front and backing to this position to get a good space to press it flat. ( this is a tiny bit more tricky to do on a small quilt, so don't sweat it if your work won't assume this position).
Note: this quilt top is made solely from fused fabrics that are assembled (another story) and fused directly to batting ( Hobbs Heirloom Cotton 80/20). The top and batting are completely unstitched in any way. That comes later. I am pillowcasing the quilt first and then I will quilt it.
This method is not recommended for non-fused quilts, so if you are not a fuser, you will have to deal with BINDING, ugh.
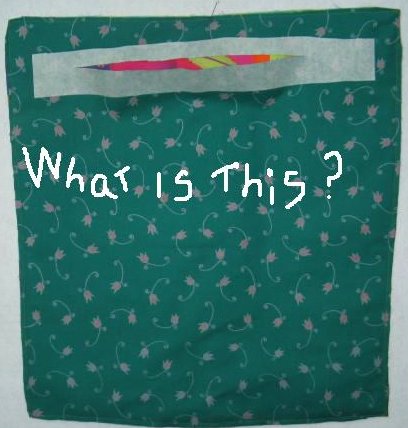
And now we are leaping ahead to the actual Escape Hatch. I am showing below that the Wonder-Under strip was fused onto the backing fabric and cut through BEFORE THE QUILT WAS PILLOWCASED.
Note: the strip of Wonder-Under is about 3x18" and one cuts through the center horizontally. I am trying to make this as clear as possible, since it may not be visible in this picture. Leave the paper on the strip until the entire quilt is pressed perfectly flat. If the backing fabric is cut slightly smaller than the front it may not show at all on the front. Quilting will tuck it back completely, so fear not.
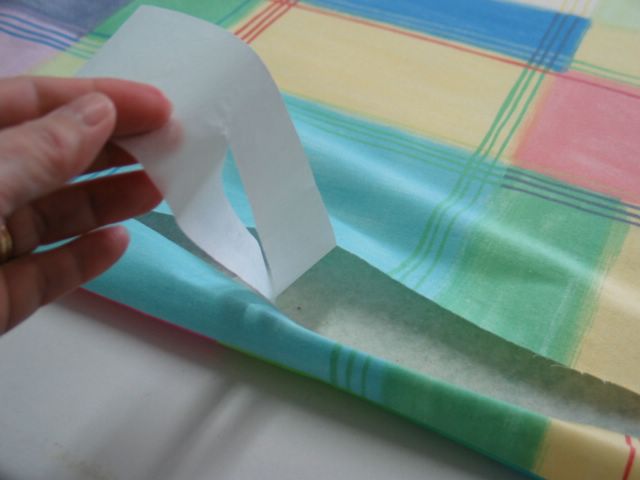
After the quilt is pressed then remove the paper strip from the Wonder-Under.

Now press the opening closed and begin to quilt.
Note: When a quilt top is fused directly to batting, and then pillowcased like this, very little basting is need before quilting. I usually just stick a few pins in the major design divisions and then stitch away.
I like this method because it leaves the design alone, not framed with an edge or border. And it works especially well on quilts that have an uneven edge. Of course this is really only for wall art, not functional quilts.


Mrs. Mel,
ReplyDeleteI have used this technique with non-fused quilts. and with great success. (but not for bedquilts).
The hint about cutting the backing just a squosh smaller makes all the difference.
It helps a lot if the top has been partially quilted to the batting.
After it's turned, though, it does need a bit more basting than a fused top.
I LOVE THE ESCAPE HATCH FINISH. I especially love it that the "secret" gets hidden behind the sleeve.
Great work!
ReplyDelete[url=http://wclbthyk.com/cckx/eokm.html]My homepage[/url] | [url=http://ndfmlskr.com/ebtz/rvrn.html]Cool site[/url]
Great work!
ReplyDeletehttp://wclbthyk.com/cckx/eokm.html | http://wtivwxsa.com/jlra/xhaa.html
Hi Mel, I too have used your escape hatch method on non-fused (pieced) wallhangings... your directions are fantastic, thanks! The process works great, some quilts just don't need a binding.
ReplyDeleteRenee